
Deep inside the bowels of Windows Vista, there’s a secret Administrator account, and it’s different from the normal administrator account you most likely have set up on your PC. This Administrator account is not part of the Administrator group. (Confused yet? You should be.) It’s a kind of superadministrator, akin to the root account in Unix, and by default it’s turned off and hidden. (In describing this tut, i’ll always use the capital “A” for the secret Administrator account, and a lowercase “a” for a normal administrator account.)
In versions of Windows before Windows Vista, the Administrator account wasn’t hidden, and many people used it as their main or only account. This Administrator account had full rights over the computer.
In Windows Vista, Microsoft changed that. In Vista, the Administrator account is not subject to UAC, but normal administrator accounts are. So the Administrator can make any changes to the system and will see no UAC prompts.
Turning on the Administrator account is straightforward. First, open an elevated command prompt by typing cmd into the Search box on the Start menu, right-clicking the command prompt icon that appears at the top of the Start menu, then selecting Run as administrator — or just use the shortcut you created in the previous hack.
Then enter this command and press Enter:
Net user administrator /active:yes
From now on, the Administrator account will appear as an option on the Welcome screen, along with any user accounts you may have set up. Use it like any other account. Be aware that it won’t have a password yet, so it’s a good idea to set a password for it.
If you want to disable the account and hide it, enter this command at an elevated command prompt and press Enter:
Net user administrator /active:no
Read more...
Wednesday, March 10, 2010
Unlock The Supersecret Administrator Account For Vista
Hide Entire Drives Partition Without Registry And Any Software
Here Is A Cool Technique Which Hides Entire Hard Disk Drives By A Simple Procedure.
This Is The Best Security Tip To Be Employed Against Unauthorised Users.
1) Go to Start > Run > type "diskpart".
A DOS window will appear with following description.
DISKPART>
2) Then type "list volume"
3) Suppose you want to hide drive E then type "select volume 3"
Then a message will appear in same window
{ Volume 3 is the selected volume}
4) Now type "remove letter E"
Now a message will come { Diskpart Removed the Drive letter }
sometime it requires to reboot the computer.
Diskpart will remove the letter.
Windows XP is not having capabilty to identify the unknown volume.
Your Data is now safe from unauthorised users.
To access the content of hidden Drive repeat the process mentioned above.
But in 4th step replace " remove" by "assign".
It means type "assign letter E".
Read more...
10 things you can do when Windows XP won't boot
When your computer hardware appears to power up okay, but the Windows XP operating system won't boot properly, you have to begin a troubleshooting expedition that includes getting into the operating system, determining the problem, and then fixing it. To help you get started on this expedition, here are 10 things you can do when Windows XP won't boot.
#1: Use a Windows startup disk
One of the first things you should reach for when troubleshooting a Windows XP boot problem is a Windows startup disk. This floppy disk can come in handy if the problem is being caused when either the startup record for the active partition or the files that the operating system uses to start Windows have become corrupted.
To create a Windows startup disk, insert a floppy disk into the drive of a similarly configured, working Windows XP system, launch My Computer, right-click the floppy disk icon, and select the Format command from the context menu. When you see the Format dialog box, leave all the default settings as they are and click the Start button. Once the format operation is complete, close the Format dialog box to return to My Computer, double-click the drive C icon to access the root directory, and copy the following three files to the floppy disk:
* Boot.ini
* NTLDR
* Ntdetect.com
After you create the Windows startup disk, insert it into the floppy drive on the afflicted system and press [Ctrl][Alt][Delete] to reboot the computer. When you boot from the Windows startup disk, the computer will bypass the active partition and boot files on the hard disk and attempt to start Windows XP normally.
#2: Use Last Known Good Configuration
You can also try to boot the operating system with the Last Known Good Configuration feature. This feature will allow you to undo any changes that caused problems in the CurrentControlSet registry key, which defines hardware and driver settings. The Last Known Good Configuration feature replaces the contents of the CurrentControlSet registry key with a backup copy that was last used to successfully start up the operating system.
To use the Last Known Good Configuration feature, first restart the computer by pressing [Ctrl][Alt][Delete]. When you see the message Please select the operating system to start or hear the single beep, press [F8] to display the Windows Advanced Options menu. Select the Last Known Good Configuration item from the menu and press [Enter].
Keep in mind that you get only one shot with the Last Known Good Configuration feature. In other words, if it fails to revive your Windows XP on the first attempt, the backup copy is also corrupt.
#3: Use System Restore
Another tool that might be helpful when Windows XP won't boot is System Restore. System Restore runs in the background as a service and continually monitors system-critical components for changes. When it detects an impending change, System Restore immediately makes backup copies, called restore points, of these critical components before the change occurs. In addition, System Restore is configured by default to create restore points every 24 hours.
To use System Restore, first restart the computer by pressing [Ctrl][Alt][Delete]. When you see the message Please select the operating system to start or hear the single beep, press [F8] to display the Windows Advanced Options menu. Now, select the Safe Mode item from the menu and press [Enter].
Once Windows XP boots into Safe mode, click the Start button, access the All Programs | Accessories | System Tools menu, and select System Restore. Because you're running in Safe mode, the only option on the opening screen of the System Restore wizard is Restore My Computer To An Earlier Time, and it's selected by default, so just click Next. Then, follow along with the wizard to select a restore point and begin the restoration procedure.
#4: Use Recovery Console
When a Windows XP boot problem is severe, you'll need to use a more drastic approach. The Windows XP CD is bootable and will provide you with access to a tool called Recovery Console.
To boot from the Windows XP CD, insert it into the CD-ROM drive on the problem system and press [Ctrl][Alt][Delete] to reboot the computer. Once the system begins booting from the CD, simply follow the prompts that will allow the loading of the basic files needed to run Setup. When you see the Welcome To Setup screen, press R to start the Recovery Console.
You'll then see a Recovery Console menu. It displays the folder containing the operating system's files and prompts you to choose the operating system you want to log on to. Just press the menu number on the keyboard, and you'll be prompted to enter the Administrator's password. You'll then find yourself at the main Recovery Console prompt.
#5: Fix a corrupt Boot.ini
As the Windows XP operating system begins to load, the Ntldr program refers to the Boot.ini file to determine where the operating system files reside and which options to enable as the operating system continues to load. So if there's a problem rooted in the Boot.ini file, it can render Windows XP incapable of booting correctly.
If you suspect that Windows XP won't boot because Boot.ini has been corrupted, you can use the special Recovery Console version of the Bootcfg tool to fix it. Of course, you must first boot the system with the Windows XP CD and access the Recovery Console as described in #4.
To use the Bootcfg tool, from the Recovery Console command prompt, type
Bootcfg /parameter
Where /parameter is one of these required parameters:
* /Add--Scans the disk for all Windows installations and allows you to add any new ones to the Boot.ini file.
* /Scan--Scans the disk for all Windows installations.
* /List--Lists each entry in the Boot.ini file.
* /Default--Sets the default operating system as the main boot entry.
* /Rebuild--Completely re-creates the Boot.ini file. The user must confirm each step.
* /Redirect--Allows the boot operation to be redirected to a specific port when using the Headless Administration feature. The Redirect parameter takes two parameters of its own, [Port Baudrate ] | [UseBiosSettings].
* /Disableredirect--Disables the redirection.
#6: Fix a corrupt partition boot sector
The partition boot sector is a small section of the hard disk partition that contains information about the operating system's file system (NTFS or FAT32), as well as a very small machine language program that is crucial in assisting the operating system as it loads.
If you suspect that Windows XP won't boot because the partition boot sector has been corrupted, you can use a special Recovery Console tool called Fixboot to fix it. Start by booting the system with the Windows XP CD and accessing the Recovery Console as described in #4.
To use the Fixboot tool, from the Recovery Console command prompt, type
Fixboot [drive]:
Where [drive] is the letter of the drive to which you want to write a new partition boot sector.
#7: Fix a corrupt master boot record
The master boot record occupies the first sector on the hard disk and is responsible for initiating the Windows boot procedure. The master boot record contains the partition table for the disk as well as a small program called the master boot code, which is responsible for locating the active, or bootable, partition, in the partition table. Once this occurs, the partition boot sector takes over and begins loading Windows. If the master boot record is corrupt, the partition boot sector can't do its job and Windows won't boot.
If you suspect Windows XP won't boot because the master boot record has been corrupted, you can use the Recovery Console tool Fixmbr to fix it. First, boot the system with the Windows XP CD and access the Recovery Console as described in #4.
To use the Fixmbr tool, from the Recovery Console command prompt, type
Fixmbr [device_name]
Where [device_name] is the device pathname of the drive to which you want to write a new master boot record. For example, the device pathname format for a standard bootable drive C configuration would look like this:
\Device\HardDisk0
#8: Disable automatic restart
When Windows XP encounters a fatal error, the default setting for handling such an error is to automatically reboot the system. If the error occurs while Windows XP is booting, the operating system will become stuck in a reboot cycle--rebooting over and over instead of starting up normally. In that case, you'll need to disable the option for automatically restarting on system failure.
When Windows XP begins to boot up and you see the message Please select the operating system to start or hear the single beep, press [F8] to display the Windows Advanced Options Menu. Then, select the Disable The Automatic Restart On System Failure item and press [Enter]. Now, Windows XP will hang up when it encounters the error and with any luck, it will display a stop message you can use to diagnose the problem.
#9: Restore from a backup
If you can't seem to repair a Windows XP system that won't boot and you have a recent backup, you can restore the system from the backup media. The method you use to restore the system will depend on what backup utility you used, so you'll need to follow the utility's instructions on how to perform a restore operation.
#10: Perform an in-place upgrade
If you can't repair a Windows XP system that won't boot and you don't have a recent backup, you can perform an in-place upgrade. Doing so reinstalls the operating system into the same folder, just as if you were upgrading from one version of Windows to another. An in-place upgrade will usually solve most, if not all, Windows boot problems.
Performing a Windows XP in-place upgrade is pretty straightforward. To begin, insert the Windows XP CD into the drive, restart your system, and boot from the CD. Once the initial preparation is complete, you'll see the Windows XP Setup screen (shown earlier in Figure A). Press [Enter] to launch the Windows XP Setup procedure. In a moment, you'll see the License Agreement page and will need to press [F8] to acknowledge that you agree. Setup will then search the hard disk looking for a previous installation of Windows XP. When it finds the previous installation, you'll see a second Windows XP Setup screen.
This screen will prompt you to press R to repair the selected installation or to press [Esc] to install a fresh copy of Windows XP. In this case, initiating a repair operation is synonymous with performing an in-place upgrade, so you'll need to press R. When you do so, Setup will examine the disk drives in the system. It will then begin performing the in-place upgrade.
Keep in mind that after you perform an in-place upgrade or repair installation, you must reinstall all updates to Windows.
Read more...
Saturday, March 6, 2010
Compare YouTube Videos By Watching Them Side By Side
If you ever want to compare two YouTube videos the best is to watch them side by side. This is usually pretty difficult if you open the videos in two different tabs or different browsers. However, these is a web app that can make it easy for you.
YouTube Doubler allows you to watch two YouTube videos side by side in the same window. All you have to do is specify the URLs of both the YouTube videos and click “Double Up”. Both the videos will start playing side by side and will allow you to observe any differences.
You can also get an embed code to put both the videos side-by-side on your website or blog. YouTube doubler is a useful tool with a simple logic. They simple take the URL of the two videos you specify and embed them on the same page so you can view them simultaneously. It will also come very handy if you are running short and time and you would rather watch both the videos at the same time.
Read more...
Friday, March 5, 2010
Fun With Winrar

[0;2;37;33m
@@@@@@@@@@@@@@@@@@@@@@@@@@@@@@@@@@
@################################@
@# COMMENT TEXT TEST #@
@################################@
@# For showing you how we can #@
@# ---------------------------- #@
@# block the Text Comment #@
@# ---------------------------- #@
@# with some colors... #@
@# ---------------------------- #@
@# The small code isn't my, #@
@# ---------------------------- #@
@# I've uncovered it alone #@
@# ---------------------------- #@
@# and then I wanna write this #@
@# ---------------------------- #@
@# small tutorial #@
@# ---------------------------- #@
@# for those guys that #@
@# ---------------------------- #@
@# don't know... #@
@###############Fractal-Impact###@
@@@@@@@@@@@@@@@@@@@@@@@@@@@@@@@@@@
=====================================
SUGGEST] BEFORE YOU HAVE TO KNOW THIS
=====================================
When you want to put the comment
on the file.RAR, I suggest to write it
before with the Wordpad or other
text program, then copy and paste on
Comment Window (ALT + M) of WinRAR...
Or save the Comment_File.txt
on you're computer and after again
in the Comment Window, click:
Load Comment From File a nd browse
your file txt.
But the first way is more better...
@@@@@@@@@@@@@@@@@@@@@@@@@@@@@@@@@@@@@@@@@@@@@@@@@@@@@@
@@@@@@@@@@@@@@@@@@@@@@@@@@@@@@@@@@@@@@@@@@@@@@@@@@@@@@
===========================================
TUTO] About How we can block the Text......
===========================================
That's simple,
as you can see, at the top of this TXT
there is a small code
like this---> [0;2;37;33m
You've to copy & paste in the first
line at the top of your comment and
click OK.
This code, block the text comment with
the dark yellow text and bacground balck...
When the text comment is blocked you cannot
copy it...
--------------------
Colors Packs Codes 1
=====================================================
SOME CODES FOR CHANGE THE COLORS OF TEXT & BACKGROUND
=====================================================
White on BG Black..........: [0;1;37m
Grey on BG Black...........: [0;1;37;30m
Red on BG Black............: [0;1;37;31m
Matrix Green on BG Black...: [0;1;37;32m
Yellow on BG Black.........: [0;1;37;33m
Blue on BG Black...........: [0;1;37;34m
Fuxia on BG Black..........: [0;1;37;35m
Celestial on BG Black......: [0;1;37;36m
=============================================
SAME COLORS ABOVE, BUT THE TEXT ARE MORE DARK
=============================================
[0;2;37m
[0;2;37;30m <<--- Hide text with black BG LOL [0;2;37;31m [0;2;37;32m [0;2;37;33m [0;2;37;34m [0;2;37;35m [0;2;37;36m @@@@@@@@@@@@@@@@@@@@@@@@@@@@@@@@@@@@@@@@@@@@@@@@@@@@@@ @@@@@@@@@@@@@@@@@@@@@@@@@@@@@@@@@@@@@@@@@@@@@@@@@@@@@@ -------------------- Colors Packs Codes 2 ====================================================== WITH THE CODES BELOW, YOU CAN CHANGE THE COLORS OF: TEXT,ONLY BACKGROUND ABOUT THAT PART WHERE IS THE TEXT, AND BACKGROUND ====================================================== White Text, Red for the part of Text & BG Black: [0;1;37;41m White Text, Green for the part of Text & BG Black: [0;1;37;42m White Text, Yellow for the part of Text & BG Black: [0;1;37;43m <<--- Bad colors Composition [0;3;37;43m <<--- But this is better, with Grey Text White Text, Blue for the part of Text & BG Black: [0;1;37;44m White Text, Rose for the part of Text & BG Black: [0;1;37;45m White Text, celestial for the part of Text & BG Black: [0;1;37;46m Grey Text, White for the part of Text & BG Black: [0;3;37;47m ========================================= OTHERS COLORS ABOUT THE COMPOSITION ABOVE BUT WITH MORE DARK TEXT ========================================= [0;2;37;41m [0;2;37;42m [0;2;37;44m [0;2;37;45m [0;2;37;46m +-----------------------------------------+ |=========================================| |Tutorial by Fractal-Impact.deviantART.com| |=========================================| +-----------------------------------------+
Read more...
Wednesday, March 3, 2010
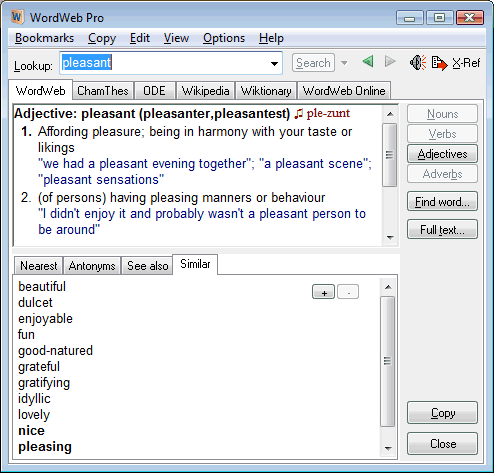
WordWeb Pro v6.03 incl. keymaker
Wordweb is a feature-rich software that does much more than a paper dictionary or thesaurus. WordWeb is truly a Word Web - each set of synonyms is linked to other related sets. Look up "tree", click on the "Types" tab and you'll have a list of different types of tree. Click on "Part of" and WordWeb will tell you that a tree can be part of a "forest" or "wood".
Read more...

Tuesday, March 2, 2010
Internet Download Manager v5.18 Build 8 incl. crack
Internet Download Manager (IDM) is a tool to increase download speeds, resume and schedule downloads. Comprehensive error recovery and resume capability will restart broken or interrupted downloads due to lost connections, network problems, computer shutdowns, or unexpected power outages. Simple graphic user interface makes IDM user friendly and easy to use. Internet Download Manager has a smart download logic accelerator that features intelligent dynamic file segmentation and safe multipart downloading technology to accelerate your downloads. Unlike other download managers and accelerators Internet Download Manager segments downloaded files dynamically during download process and reuses available connections without additional connect and login stages to achieve best acceleration performance.
Read more...

Particle Illusion v3.0 incl. crack
particleIllusion is a standalone application that allows you to quickly and easily create amazing effects: explosions, smoke, fire, sparkles, motion graphics backgrounds, space effects, creatures, and abstract artistic effects -- literally hundreds of different types of effects. particleIllusion is our fully-featured professional version. It uses the latest version of our particle engine, and can create the largest number of effects, with amazing realism and complexity.
What types of effects are included? Too many to list, and many that would be nearly impossible to describe with words, but a few include: explosions, fire, smoke, fog, waterfalls, sparks, sparkles, fireworks, rain, snow, puddle splashes, motion graphics backgrounds, magic effects, space warps, abstract lights, lava, flocks of birds, geometric shapes, aurora, bubbles, waves, rainbows, light beams -- dozens of different types, and hundreds of variations.
This large (and ever-growing) library of effects allows you to create immediately, with no learning curve and almost no effort. You can also customize these effects to create subtle variations or entirely new effects, then save your new presets.
Read more...

Sunday, February 28, 2010
Magic Video Converter 8.0.2.18 incl. serial
Magic Video Converter supports following files:
.3gp........................... - 3GPP Files and 3GPP2 Files
.aac........................... - AAC Files
.ac3........................... - Raw AC3 Files
.amr........................... - AMR Audio Files
.avi........................... - AVI Files
.cmf........................... - Casio Movie Format Files
.dv or .dif.................... - DV Video Files
.flv........................... - Flv files (youtube)
.gif........................... - Animated GIF Files
.h261.......................... - Raw h261 Files
.h261 or h.264................. - Raw h264 Video Files
.m4a or .mp4a.................. - MPEG-4 Audio Files
.m4v........................... - Raw MPEG4 Video Files
.mjpg or .mjpeg................ - MJPEG Video Files
.mkv........................... - Matroska Files
.mov or .qt.................... - QuickTime Files
.mp2........................... - MP2 Files
.mp3........................... - MP3 Files
.mp4........................... - MPEG-4 Files
.mpc or .mpp................... - Mousepack Audio Files
.mpg, .mpeg, .mpa, .dat or .vob - MPEG Files
.nut........................... - NUT Files
.ogg........................... - Ogg Vorbis Files
.rm or .rmvb................... - Real Media Files
.str........................... - Old PlayStation Files
.swf........................... - Macromedia Flash Files
.ts or .trp.................... - HDTV Transport Stream Files
.wav, .au or .aiff............. - WAV Files
.viv........................... - VIV Files
.wma, wmv or .asf.............. - Windows Media Files
.yuv........................... - Raw Video Files
Read more...

Driver Genius Pro 9.0.0.186 incl. crack n serial
What is Driver Genius?
Driver Genius is a powerful driver manager for Windows that can backup, restore and update your drivers in several mouse clicks!
Backup Drivers - Driver Genius can detect and quickly backup the installed drivers in your system. It can compress the backup drivers to a zip file, self extracting file or an independent auto installer program.
Restore Drivers - You need not install drivers one-by-one after reinstalling your operating system. Just one click is all you need to install all your backup drivers automatically. You can also install drivers in command mode silently.
Update/Search Drivers - Are you still using an old driver or beta version drivers? These faulty drivers often cause compatibility problems and are one of the main causes of system crashes. A suitable driver can improve hardware performance by 50% or even more. There is information on more than 30,000 device drivers in the Driver Genius Database including Motherboard, Sound card, Video card, Network card, Modem, Mouse, Keyboard, Scanner, Printer, Digital devices etc. With one mouse click, Driver Genius can detect what drivers need updating. All drivers we offer are official version or WHQL versions--you can use them without any worries.
Uninstall Drivers - There could be some leftover drivers in your system due to hardware changes or previous driver updates. Driver Genius can find these useless drivers quickly and uninstall them.
LiveUpdate - We will update large numbers of drivers on our website. You can synchronize your database with our website to get the latest driver versions through the Liveupdate feature.
What can I do with Driver Genius?
Quickly backup device drivers for your computer.
One click will install all drivers.
Keep your drivers up to date.
Scan and fix your driver problem.
Compatible with: Windows 98/ ME/ 2000/ XP/ 2003/ Vista/ XP x64/ Server 2003 x64/ Vista x64 / Win7 / Win7 x64
Mulitlingual: English, Spanish, French, Italian, German, portugues, etc
Read more...


